Organizing Devices with Tags
A Tag is a key/value pair that is applied to an Octave edge device to allow common actions to be applied to all devices with the same Tag.
Creating a new Tag for your Organization
Creating and Applying a Tag to a Single Device
Follow the steps below to create and apply a new Tag to a device:
- Navigate to Build > Device > Details.
- Locate the Tag section and click the edit button.
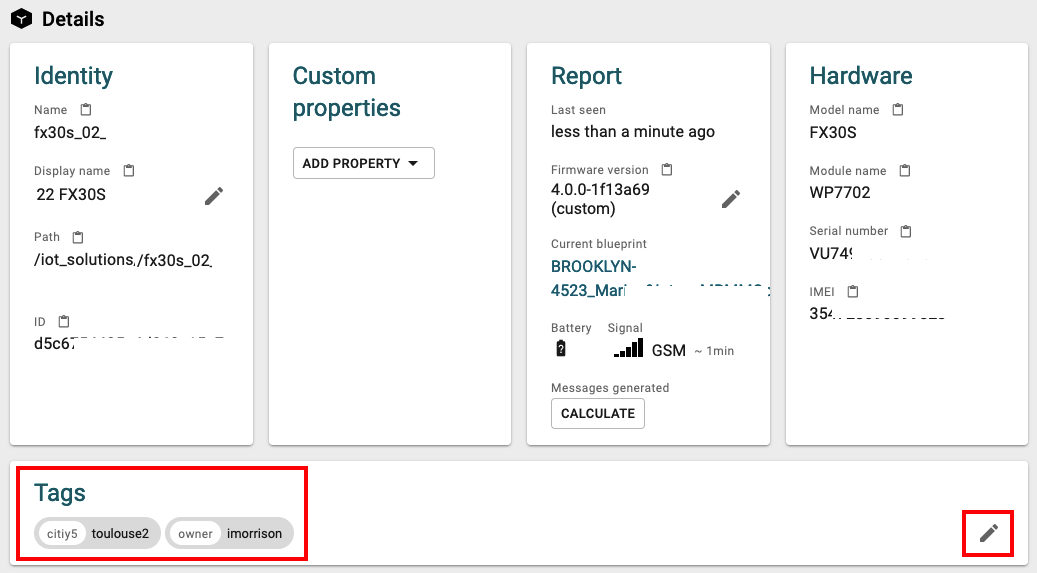
- Click New Tag when the dropdown appears:

- Select Category from the dropdown and enter a new Tag name in the Value field:

- Click Add:

Note
Once the Tag has been added, it is accessible by all members of your organization to apply to any Device.
To remove a Tag from a device, click its "X" button:

Creating and Applying a Tag to Multiple Devices
Follow the steps below to create and apply Tags to multiple devices:
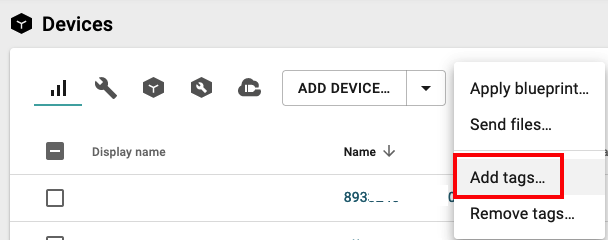
- Navigate to Deploy and Monitor > Devices and select the devices to which you want to add tags.
- Select Add tags from the dropdown:
- Locate a Tag in the dropdown or click New tag to create a new Tag:
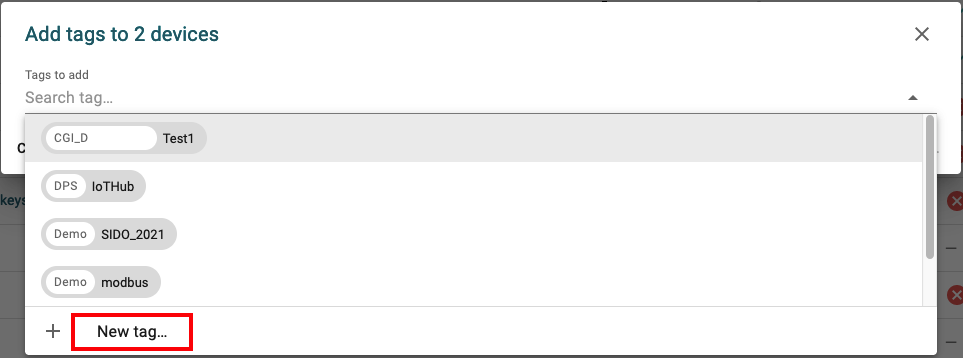
- Select Category from the dropdown, enter a new Tag name in the Value field, and click Add.
- Click Add to confirm that the tag be added to the selected devices:

To remove Tags from devices:
- Select Remove Tags:
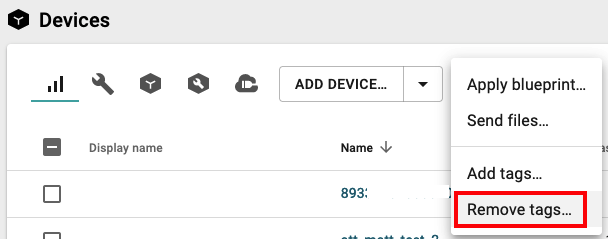
- Select the Tag(s) to remove and click Remove:

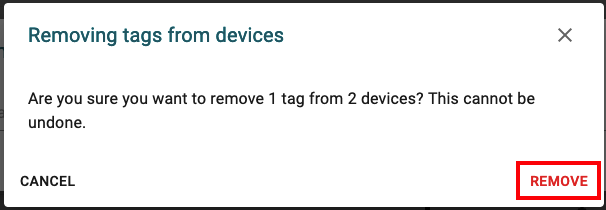
- Click Remove to confirm the Tag removal:
Aggregating Device Data with Tags
The following describes how to trigger a Cloud Action from multiple device Streams (this is known as Aggregating Events with Tag Actions:
Consider a group of devices which have the Tag dashboard: true (which can be seen in the screenshot below) and you want to forward your data from each device's /:default Stream to a dashboarding cloud endpoint with a Cloud Action or a connector. Rather than setting up one Cloud Action or connector per device–a process that does not scale with a dynamic fleet–you can create a Cloud Action/Connector with the Source being: Tag is dashboard: true, Stream /:default. All devices with that Tag and Stream will see their data pushed to the expected cloud endpoint.
Managing Device Configurations with Tags
Tags can assist with mass deployment and permissioning (e.g., to apply a Blueprint to all devices tagged with a given name/value pair). This is a way to target specific settings to be applied to a set of devices, based on a Tag as an identifier. In a similar fashion, you can initiate firmware upgrades to a selected set of devices based on Tags.
Note
An edge device has no knowledge of the Tags which are applied to it. Device Tags are automatically added on the cloud side to all generated Events from tagged devices.
See the following sections from above for steps on adding Tags:
Managing Tags Through the Octave API
The Octave REST API can be used to add and remove Tags from devices.
Note
In order to invoke the API's endpoints, you must first obtain your master token and user ID. These are both available on the user screen in the Octave Dashboard.
Adding a Tag to a Device
Invoke the company/device/addTags endpoint to add a Tag to a Device. The tags collection in the body specifies the Tag(s) to add. Replace key with the name of a Category and Value with the value to set for the Tag:
Host: octave-api.sierrawireless.io
PUT /v5.0/company/device/addTags HTTP/1.1
X-Auth-User: <your user ID>
X-Auth-Token: <your master token>

Content-Type: application/json


{
	"tags": {
		"key": "value"
	},
	"deviceIds": ["device_Id"]
}
Removing a Tag from a Device
Invoke the company/device/removeTags endpoint to remove a Tag from a device. The tags collection in the body specifies the Tag(s) to remove. Replace key with the name of a Category and Value with the value to set for the Tag:
Host: octave-api.sierrawireless.io
PUT /v5.0/company/device/removeTags

X-Auth-User: <your user ID>
X-Auth-Token: <your master token>

Content-Type: application/json


 {
	"tags": {
		"key": "value"
	},
	"deviceIds": ["device_Id"]
}
Updated about 3 years ago
