Adding and Removing Users
Octave users with admin rights have the ability to manage users within a company on Octave. A company represents an Octave account, its collection of users, and its own billing information. User administration is performed on Octave's User screen:

Adding a User
Follow the steps below to add a new user:
- Navigate to Manage > Users in the left navigation bar in the Octave Dashboard.
- Click Invite User (1).
- Enter the email address of the new user and click Invite.
An email will be sent to the user. If the user has an existing Sierra Wireless account, they will be able to log in to Octave with it to access your company's account. If the user doesn't already have an existing Sierra Wireless account, they will first be invited to create one. The user then has 24 hours to accept the invitation before it expires.
The user will appear in the list with a clock icon (2) if the invitation is pending acceptance by the user. The user count (3) at the bottom of the screen shows the number of confirmed users for the company.
Removing a User
Follow the steps below to remove a user:
- Navigate to Manage > Users in the left navigation bar in the Octave Dashboard.
- Locate the user in the user list.
- Click the Trash button (5) and confirm the deletion. If an invitation is pending, the invitation will be cancelled. If the user is already a confirmed user, they will be removed from the company but will still retain a Sierra Wireless account.
Adding or Removing Groups
The Add Groups button/drop down (4) allows you to configure the user groups which one or more users are included in. This allows you to manage user permissions and rights which are controlled by including or excluding users from specific groups.
Adding Groups
Adding groups using the Add Groups button means to assign the selected user(s) to new groups in addition to retaining the users' existing group allocations. This differs from setting groups which specifies the absolute list of groups to assign to the user(s).
Follow the steps below to add one or more groups to the selected user(s):
- Select one or more users in the list to enable the Add Groups button/drop down.
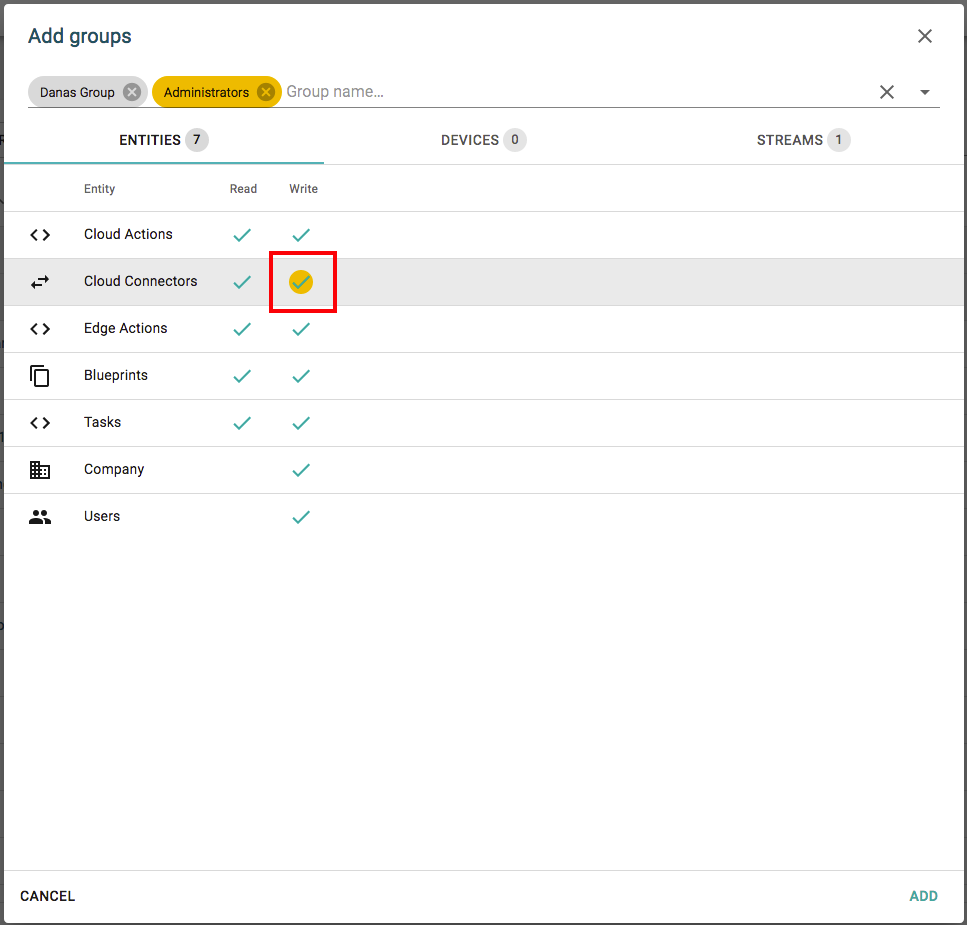
- Click Add Groups to display the Add groups popup.
- Add one or more groups on the popup.
- (Optional) Hover the mouse over various permissions in the popup to highlight which group provides those permissions:

- Click Add to close the popup.
Setting Groups
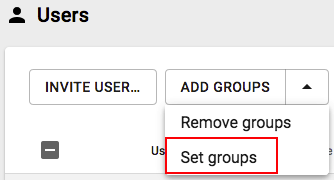
You can click the dropdown menu to set the absolute list of groups to assign the selected user(s) to:

Unlike adding groups which assigns additional groups to the selected user(s), setting groups specifies the absolute list of groups to assign. For example, if a user is currently assigned to groups named Edge and Cloud and you set the user's groups to Administrators, the user will only be in the Administrators and Users groups (all users are automatically included in Users). In this case, the user will no longer be part of the Cloud and Edge groups.
Follow the steps below to set the groups for the selected user(s):
- Click the drop down arrow beside the Add Groups button and select Set Groups.
- Select one or more groups in the popup's Group name field.
- Click Set.
Removing Groups
Follow the steps below to unassign one or more groups for the selected user(s):
- Click the drop down arrow beside the Add Groups button and select Remove Groups.
- Select one or more groups in the popup's Group name field.
- Click Remove.
Updated over 4 years ago
