Inputs
Inputs are assets that push signals to the Octave-enabled device at some arbitrary time and interval. You will create an input resource in Octave any time you have an asset connected to the Octave-enabled device that you want to monitor in Octave.
Note
If the asset does not push data to the Octave-enabled device, then you must use a sensor instead, to poll for the data from Octave.
The following steps describe how to add and configure an input resource in Octave that is connected to a GPIO pin.
Configuring an Input
Inputs such as GPIO input pins, must be configured on the Device > Services screen. Follow the steps below to add a new GPIO input pin:
- Navigate to Device > Services (1), locate the GPIO section (2), and click Configure (3).

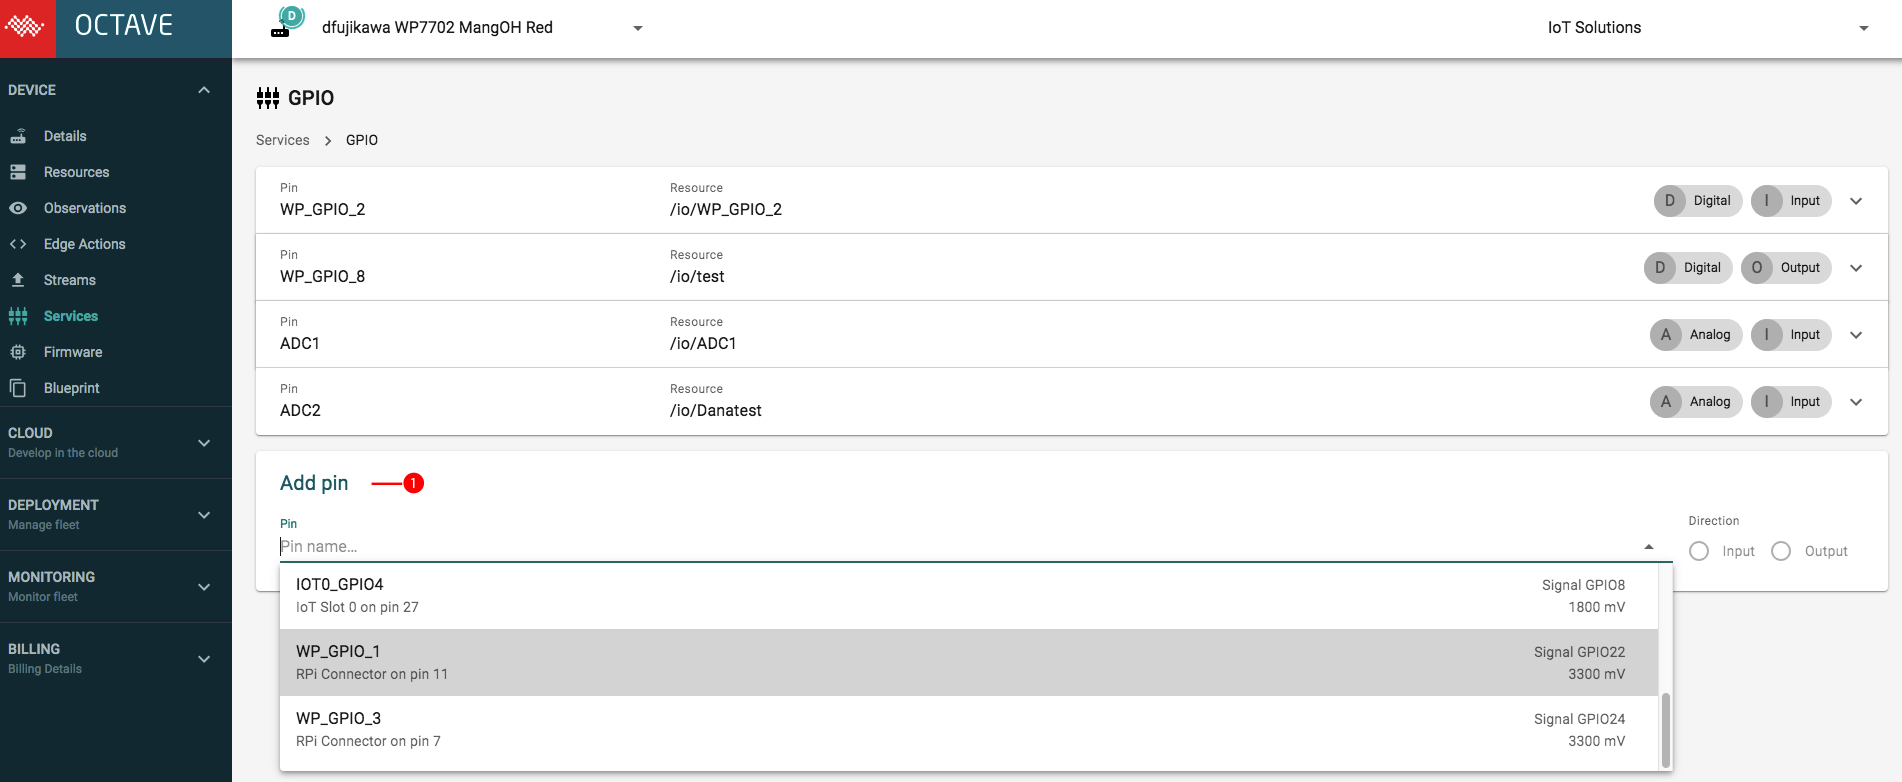
- Locate the Add pin (1) section.

- Click the Pin (1) drop down and select a GPIO pin (e.g. WP_GPIO_1).
- If the input supports both input and output signals, ensure that Input (1) is selected for the pin. Note that the Input field (1) is automatically selected and set to read-only when the selected pin only supports one direction.

- (Optional) Set the Resource field (2) to a more descriptive name. By default, the Resource created by the IO service will share the name of the pin that it connects. However, it's usually much more practical to use a short name that describes what you are actually connecting. For example, red_led might make sense for a digital output connected to an LED, while photoresistor might make sense for an analog input name.
- Click Add (3) to add the input to the list. Note that the path provided in the previous step has been prepended with /io.
Updated about 5 years ago
