Getting Started with the FX30
What You'll learn
In this tutorial, we'll use Octave to observe the value of the Analog Input available on the power connector of the FX30 used as sensor value, generate repeated events for these sensor values, forward the data to an external cloud service (Webhook) and write an event handler that executes at the edge to extract the event values, and set the color of the user LED on an FX30.
Prerequisites
Before you start, you will need:
- An FX30 with a pre-configured WP7702 2G/LTE-M module running Octave edge software and Sierra Wireless SIM card. If you don't have one yet, you can contact us.
- Sign up for an account to get access to the Octave web UI, API, and documentation.
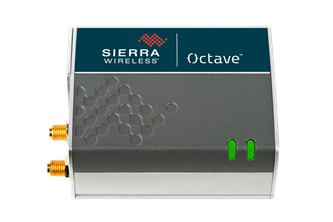
The FX30 provides an integrated, secure embedded application environment, tightly integrated with the cloud, enabling scalable deployments of IoT applications. With Serial, USB, I/O interfaces, and IoT Expansion cards; the FX30 can connect to many machines, sensors, and industrial assets.
1. Set up and Verify Communication
Follow the steps below to run your FX30 and verify that it is communicating with Octave:
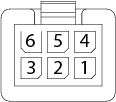
- Attach the power cable to the FX30's power connector:
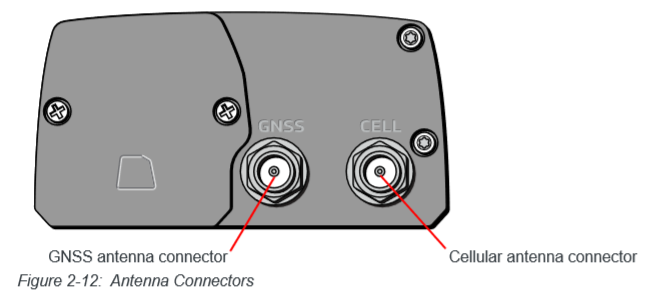
- Connect the cellular antenna
Note
For additional information you can find the FX30 and FX30S user guides here.
- Power on the FX30, the Power LED color shall be RED. Now you will have to activate the device on Octave before it can communicate.
- Open the Octave user interface in a browser on your development PC.
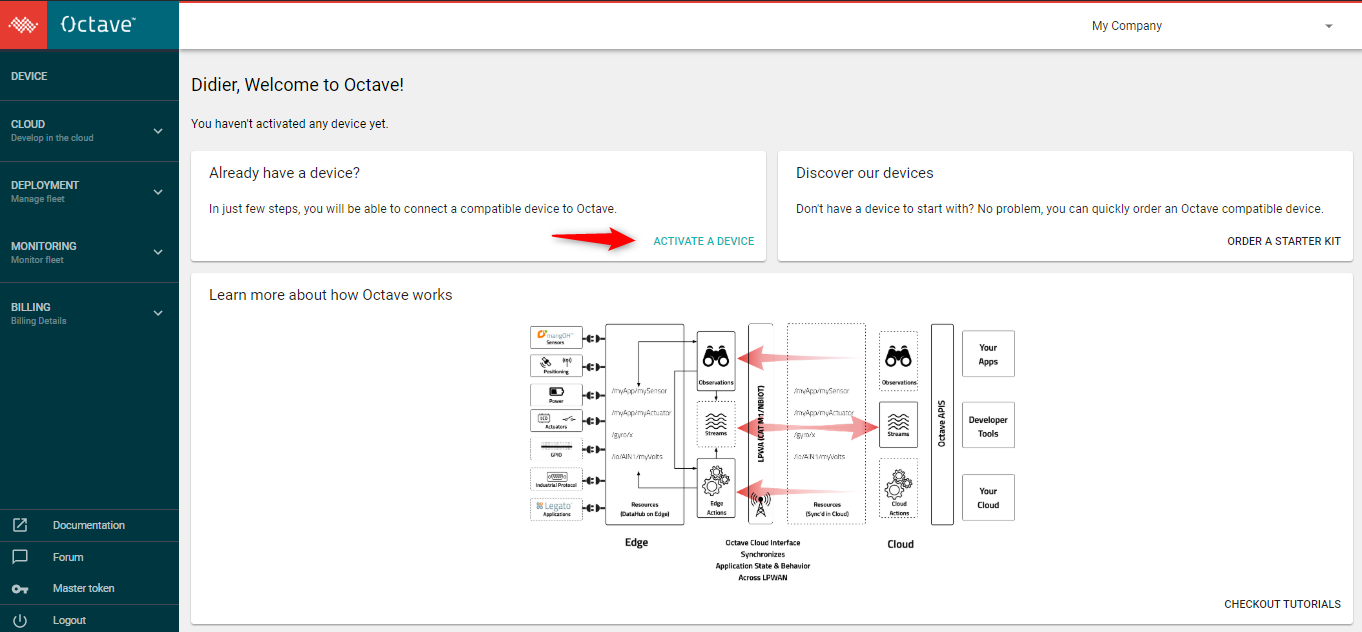
- Activate your FX30 entering the Serial Number (S/N) and IMEI printed on the side of the FX30, and enter a name you will use later to identify it on Octave.
- Octave is asking you to enter your payment information before the FX30 gets actually activated. Confirm. It takes some minutes to provision the device on the network, make sure you keep the mangOH powered up during the process.
- As soon as the FX30 is activated it will communicate with Octave, you can check the Last seen field in the Device Details section, indicates that the device reported within a few seconds (e.g. Less than 20 seconds ago).
Verifying Connectivity to the Cloud
By default, the FX30 is configured in Developer Mode, that means that it is always connected to the platform and any change in the cloud will be applied on the device within few seconds.
Before we go further, check the last seen date on the device details page of the web UI as well as developer mode status.
If you have trouble connecting your device, you can double check that the Power LED is solid amber, the cellular antenna is correctly plugged in, and you are in an area with some cellular coverage. In case all these are good then do not hesitate to contact Octave support.
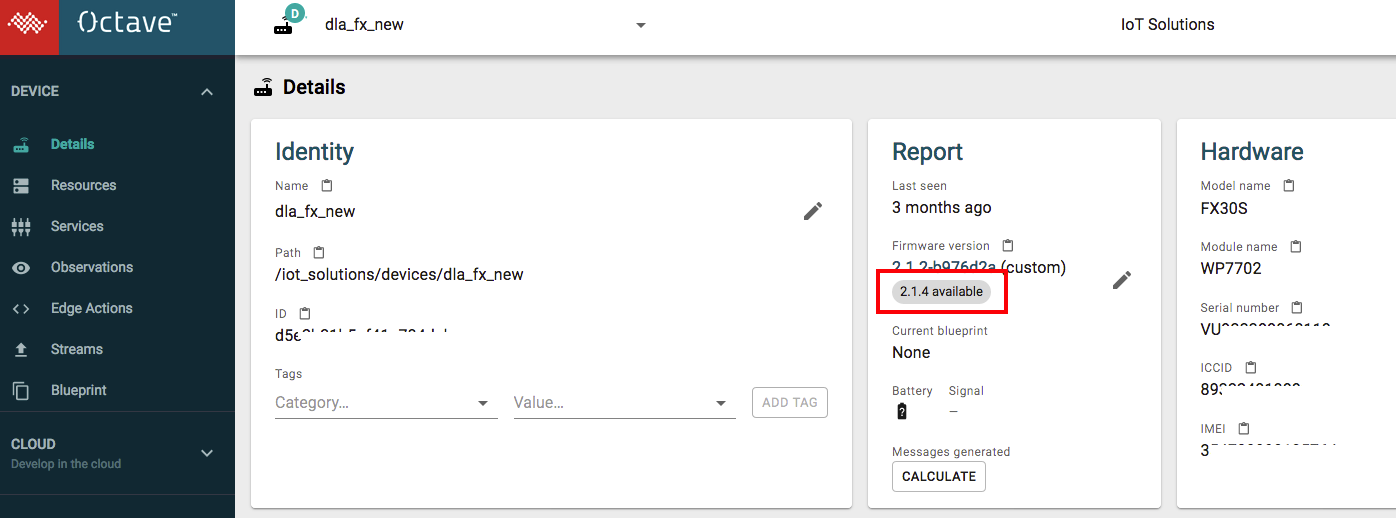
- (Optional) Update the device's firmware to ensure you are on the latest version. You can either update it locally using these instructions, or deploy it to the device from Octave by clicking on the available firmware version:
2. Commanding Resources
The FX30 has a user LED which is available for the user application.
This LED is actually a combination of a Green and a Red LED providing possibly 3 different colors: red, green or amber.
Green is obtained configuring the Green LED on and Red LED off.
Red is obtained configuring Green LED off and Red LED on.
Amber is obtained configuring Green LED on and Red LED on.
In Octave the Green and Red LEDs are managed by the GPIO service, as output Pins of the FX30.
The GPIO service, once configured will represent them as Resources , so we can act on them.
Let's see how we can use Octave to control it.
- Navigate to Device > Services
- Locate GPIO service and click Configure.
- In the Pin name enter LED_USR, select LED_USR_GRN, choose a name for the resource. example: green. Enter the name into Resource (e.g.,
/io/green). - Click on Add: the configuration is sent to the device, so it will provide a new resource to control the green user LED.
- Now, in the Pin name enter LED_USR, select LED_USR_RED, choose a name for the resource. example: red. Enter the name into Resource (e.g.,
/io/red). - Click on Add
- Navigate to Device > Resources.
- Locate the io Resource, you shall see the 2 resources created for the user LED.

Note
To switch on the LED you must set the resource to false.
Set the resource value to true to switch it off.
The logic of LED signals is inverted.
LED Resources have each a /value appended to their names to indicate that their values can be configured. On the Resources screen, the Configured value column can be used to manually toggle the LEDs' boolean values to control their on/off states used at boot time.
Follow the steps below to change the color of the user LED to red:
- Click on the Configured value for green/value and set it to true.
- Click on the Configured value for red/value and set it to false.
- Apply, after a few seconds the user LED on the device should now display as red.
You can try to switch values to see the user LED green or amber.
Congrats !
You manage to program your device from the Cloud.
3. Configuring sensor resources
Now we propose to observe the value of the Analog Input available on the power connector of the FX30 used as sensor value, Pin 5 (Green) of the connector described here.
Follow the steps below to enable the sensor and configure the frequency at which the input value will be polled by Octave:
- Navigate to the Device > Services page
- Select the GPIO service
- In the Pïn name, enter EXT to filter the GPIO available on the rear port, check Analog and Input to filter the analog input pin. Select the Pin EXT_IO2_AI

- Choose a name for the resource: sensor and Click Add to save.

- Navigate to Device* > Resources page, locate the io/sensor** Resource.
- Locate the Resource's enable property, set it to true. Note the "M" icon to the right of the property's name, which indicates that the property must be configured to use it.
- Locate the Resource's period property. Set the value for Period to 4 (for four seconds). This controls how often the sensor's value will be polled by Octave, and in turn, how often events corresponding to the sensor's reading will flow through Octave.
- Click Apply to save the change and send the new configuration to the device.
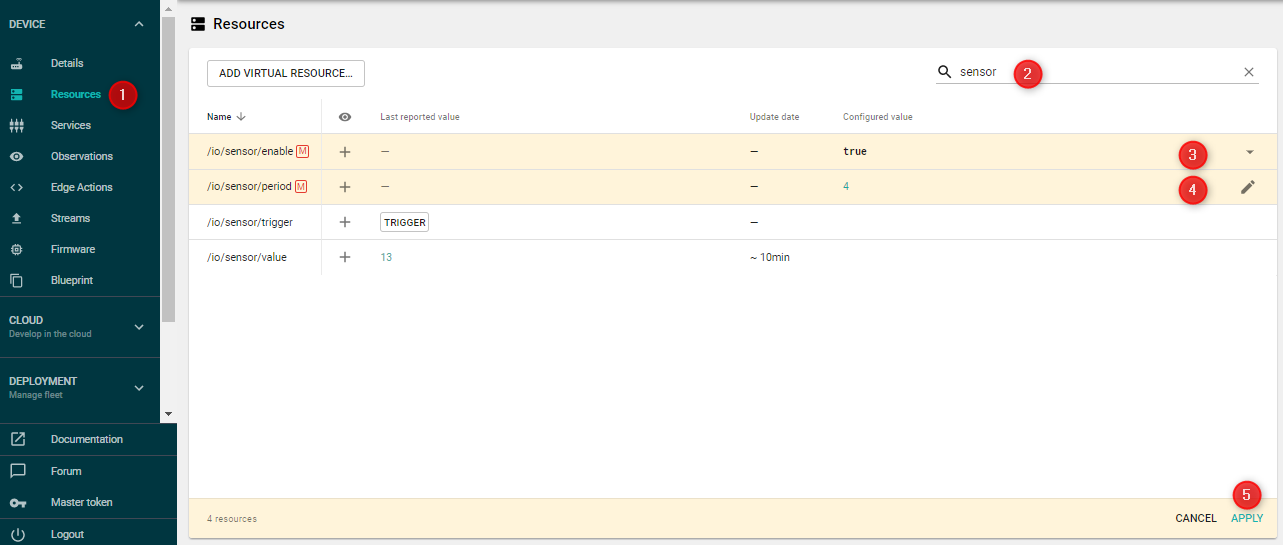
After few seconds you'll see that the "Last reported value" has been updated and "Update date" says when.

Developer Mode
You see this update on the Resources screen because the device is in Developer Mode. Remember, in Developer Mode the device periodically updates all of it's last-known values for every Resources, regardless if it is set to be Observed or not.
4. Prepare an Observation for a Resource
In order to do something with the values being polled every 4 seconds from the sensor, we need to create an Observation. An Observation is a pipe through which Events flow from a Resource to various targets such as another Resource, to the cloud immediately (Cloud Stream), store on the device and forward with other events at a given period (Store and Forward), or a script running on the device (Edge Action):
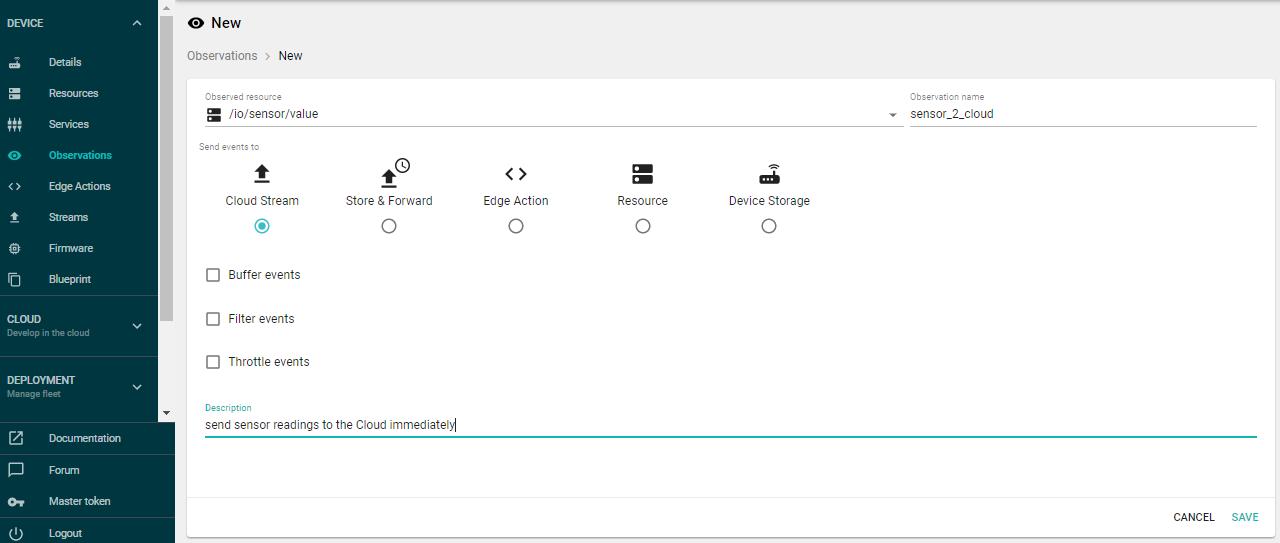
Follow the steps below to create an Observation on the sensor Resource. This will be used to observe sensor readings from the Resource and send them immediately to the Cloud. Each new reading will be sent to as an Event (JSON document) in a Stream nammed as the Observation:
- Navigate to Device > Observations.
- Click Add Observation.
- Click the Observed resource drop down and select /io/sensor/value.
- Enter a descriptive Observation name to uniquely identify the Observation, example sensor_2_cloud.
- Set Send events to to Cloud Stream.
- Click Save.
You can view the new observation created in the list.
Now you can Navigate to Device > Streams and check there is a new stream created in the Cloud for that device:

Note
You can change the value reported by the FX30 connecting alternatively the Green wire to the Black and Red.
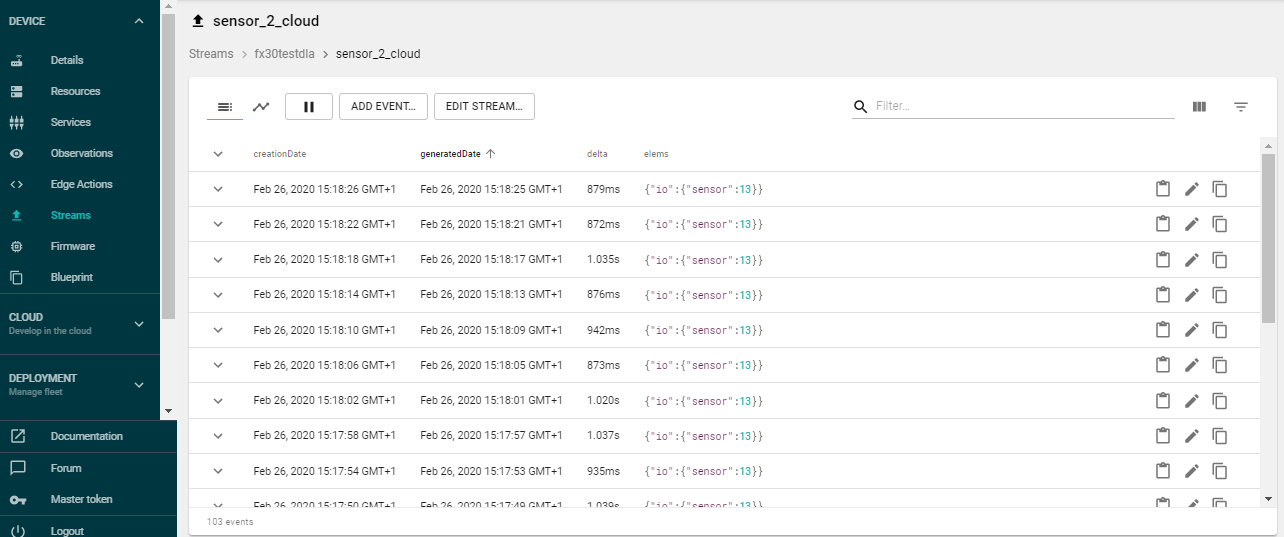
You can click on the Stream sensor_2_cloud to inspect the Events received from the FX30.
When new events arrive in the cloud from the device Octave store them in a Stream and add additional meta-data. Note that both the time at the edge (generatedDate) , as well as the time received in the cloud (creationDate) are stored. Having both of these times available for each event is important when we try more sophisticated data orchestration strategies.
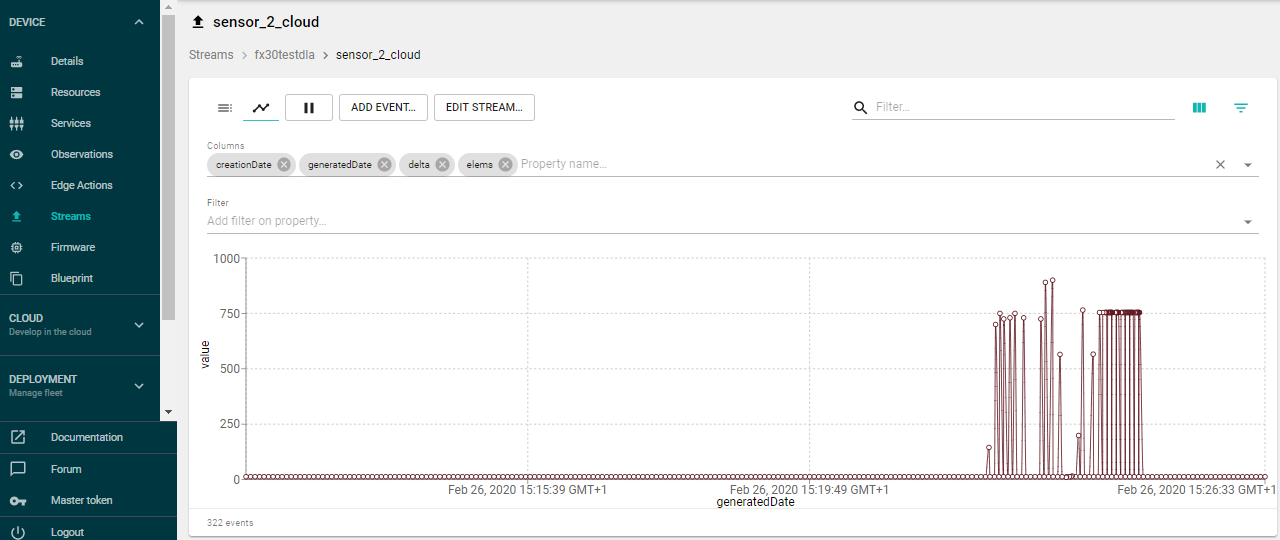
Tools to inspect streams
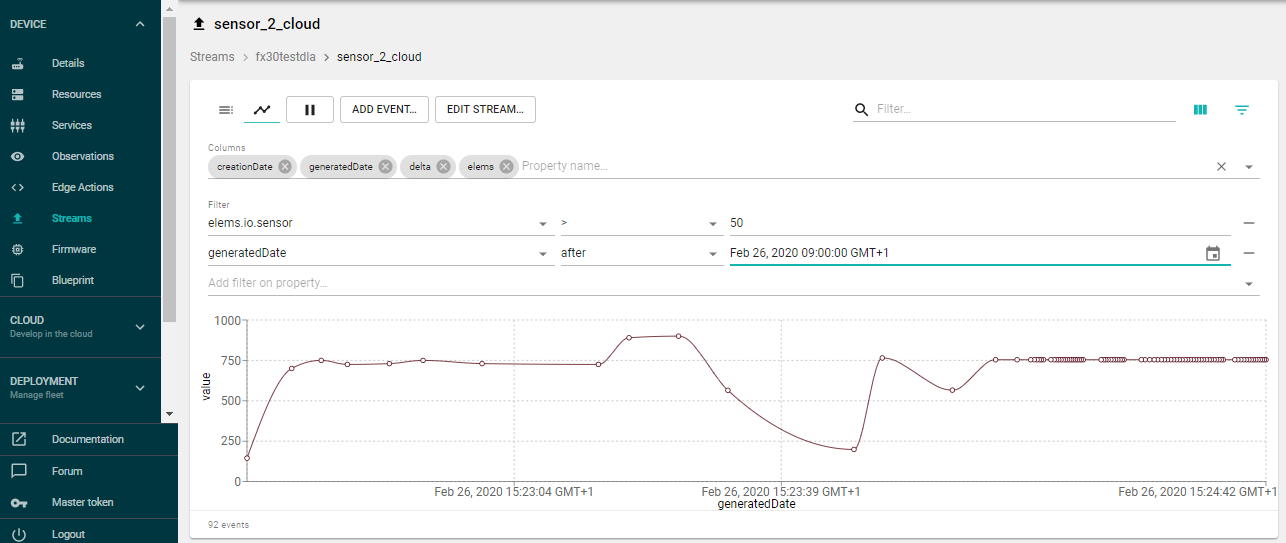
You can inspect events in streams using filters on any element and graph numerical data.
An example is to visualize the sensor readings above 50 from 9 AM today:
5. Sending data periodically
While some data benefits from being sent to the cloud instantly, there is a cost for choosing to do so. Firstly, every time we start and stop the cellular data session, power is consumed.
Secondly, encapsulating each reading for transmission individually causes more data to be sent over the air. This is reflected in pricing.
In order to optimize our power and bandwidth consumption, we can chose to have our readings stored and forwarded on a periodic basis. The Cloud Interface service embedded in the device provides us with a buffer for Events we wish to store and allows us to dynamically configure how often that buffer is sent to the cloud.
It is important to note that you are configuring the maximum time between transmissions. For example, if the store and forward buffer is set for 120 seconds and an "immediate" event is generated 30 seconds after the last transmission, the contents of the buffer will be sent with the "immediate" event, and the 120 second timer reset.
The /cloudInterface/store_forward resource controls that maximum time between transmissions.
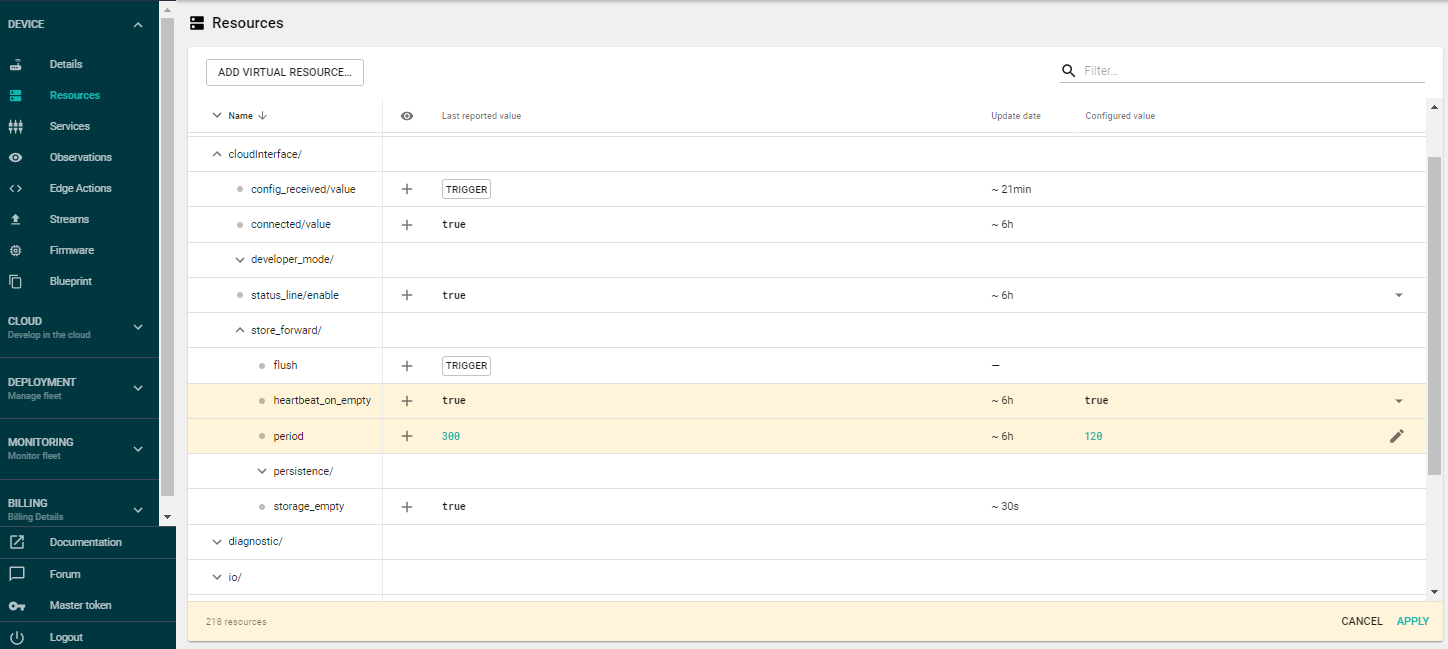
For more details, check our example here
6. Forward data to a cloud service
As we have seen in the previous steps, device events are organized into entities called "streams" represented by a single path (example: /company_xxx/devices/device_yyy/sensor_2_cloud).
On Octave, Stream Events can be processed by Cloud Actions.
A Cloud Action is a script written in Javascript language and is triggered when new Events are written in a Stream.
The Cloud Action takes an Event as input and can produce zero or more events in any pre-defined stream while also accessing data from other Streams and executing REST requests.
The following Cloud Action takes the events coming from the sensor, adds the device name and timestamp, and forwards the event via a WebHook to a REST endpoint.
In the following example, we propose to use https://webhook.site to represent a cloud service receiving data from Octave:
- Navigate with your Web browser to https://webhook.site.
- Copy the url of the Webhook they have generated for you.

- In Octave, Navigate to Cloud > Cloud Action.
- Click Add Cloud Action.
- In the form, choose the input stream containing Events from sensor (example: /company_xxx/devices/device_yyy/sensor_to_cloud)
- Select the POST HTTP option: You cannot type in Javascript yet! but click to continue.
- Paste the following code, and change the webhook site url with the one you got in step 2.
function(event) {
  var data = event.elems;
  var deviceId = event.path.split("/")[3];
  var company = event.path.split("/")[1];

  // options is not used here, but in most real Cloud services implementation, there are authentication headers ...
  var options = {
    'Content-Type': 'application/json',
  };

  var body = JSON.stringify({
    "event_received": data,
    "deviceId": deviceId,
    "company": company
  });

  // Post the data to the test cloud service (dump)
  var resultPost = Octave.Http.post("https://webhook.site/YOUR_ID/post", options, body);
  // console log to view server reply: you can see logs using Simulate
  console.log(resultPost);
}
- Save.
- Check that every 4 seconds, readings are sent to the cloud service webhook
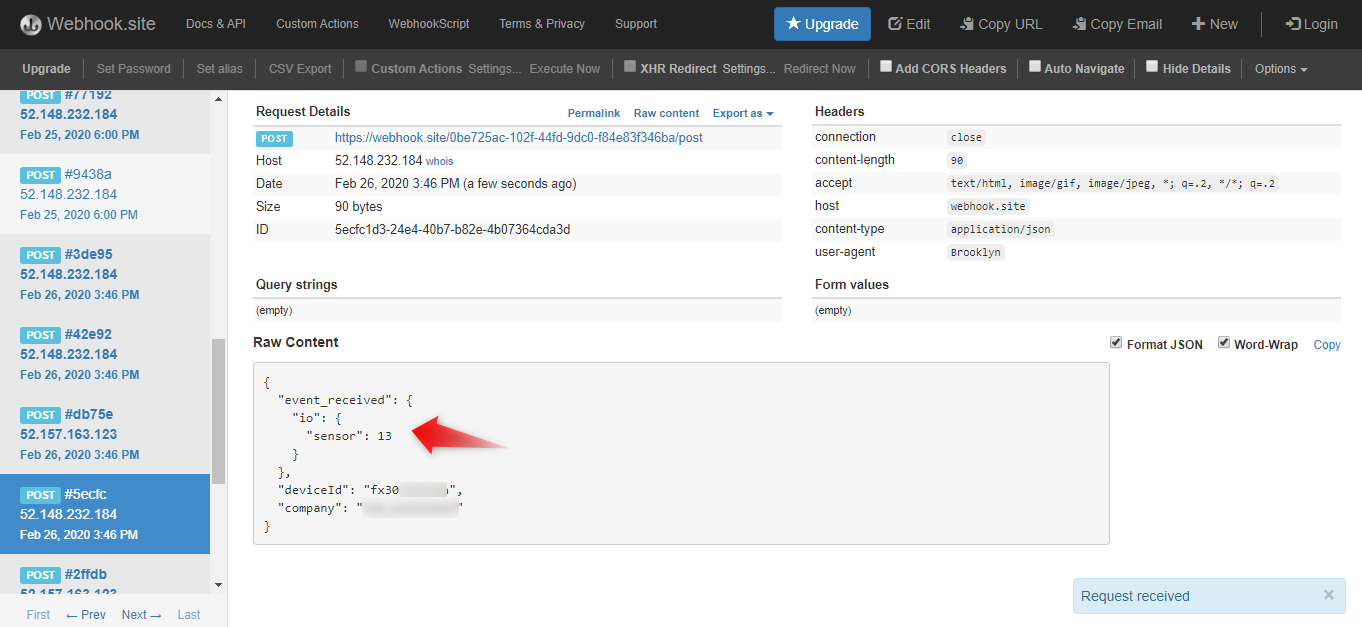
Integrate with the Cloud service you are using
Webhook.site is used in this guide to give an example, as you may see, you can adapt the Cloud action to format the data and forward it to the Cloud service which makes sense for your application.
7. Processing data in an Edge action
Going one step further, we can use an Edge Action to process data locally, avoiding the round trip to the Cloud and being more efficient.
In the following example we create an observation sending sensor values to an edge action. The edge action turns on FX30's user LED from red, amber to green depending on the value.
First create the Observation and send it to the Action Runner.
Follow the steps below to create an Observation on the /io/sensor/value Resource. This will be used to observe sensor readings from the Resource and send them to an Edge Action as events. An Edge Action is an event handler that runs on the device to perform some action on an event:
- In Octave, navigate to Device > Observations.
- Click Add Observation.
- Click the Observed resource drop down and select /io/sensor/value.
- Enter a descriptive Observation name to uniquely identify the Observation.
- Set Send events to to Edge Action. You will implement an Edge Action in the next section that will extract the sensor value and turn on/off the user LED io.
- Click Save.
An Edge Action is a powerful mechanism for handling event data on the device (hence the name Edge Action), and routing it to other targets.
Follow the steps below to create an Edge Action that handles the sensor event routed through the Observable, and turns on FX30's user LED from red, amber to green depending on the actual value read:
- Navigate to Device > Edge Actions.
- Click Add Edge Action.
- Click on Source Observation and select the Observation created in the previous section.
- Enter a descriptive Edge Action name to uniquely identify the Edge Action.
- Click on the Documentation tab. Octave provides a number of example scripts that you can use as a starting point.
- Copy and paste the code into the Code section.
function(event){
  var sensorReading = event.value;
  var isGreen=false;
  var isRed=false;

  if (sensorReading > 5000) { isGreen = true; isRed = false; } else
  if (sensorReading > 500) { isGreen = true; isRed = true; }
  else { isGreen = false; isRed = true; }

  return { "dh://io/green/value": [!isGreen],"dh://io/red/value":[!isRed] }
}
- Click Save.
- Wait for the four-second Resource polling period to elapse and then view the user LED on FX30 changing color based on the value read on the ADC.
8. Next steps
Now that you have set up communications between your FX30 and Octave you are ready to move on to the following topics for setting up IO between the FX30, your asset(s), and Octave:
- FX30 Red Digital Output
- FX30 Red Digital Input
- Modbus
- CANopen
- Connect to your asset over Serial link using Octave Resource Protocol
- Experiment other combinations of observations in Routing Events from Observations
- Discover the other APIs available to process data at the edge
- Orchestrate data in the Cloud
Updated about 5 years ago
